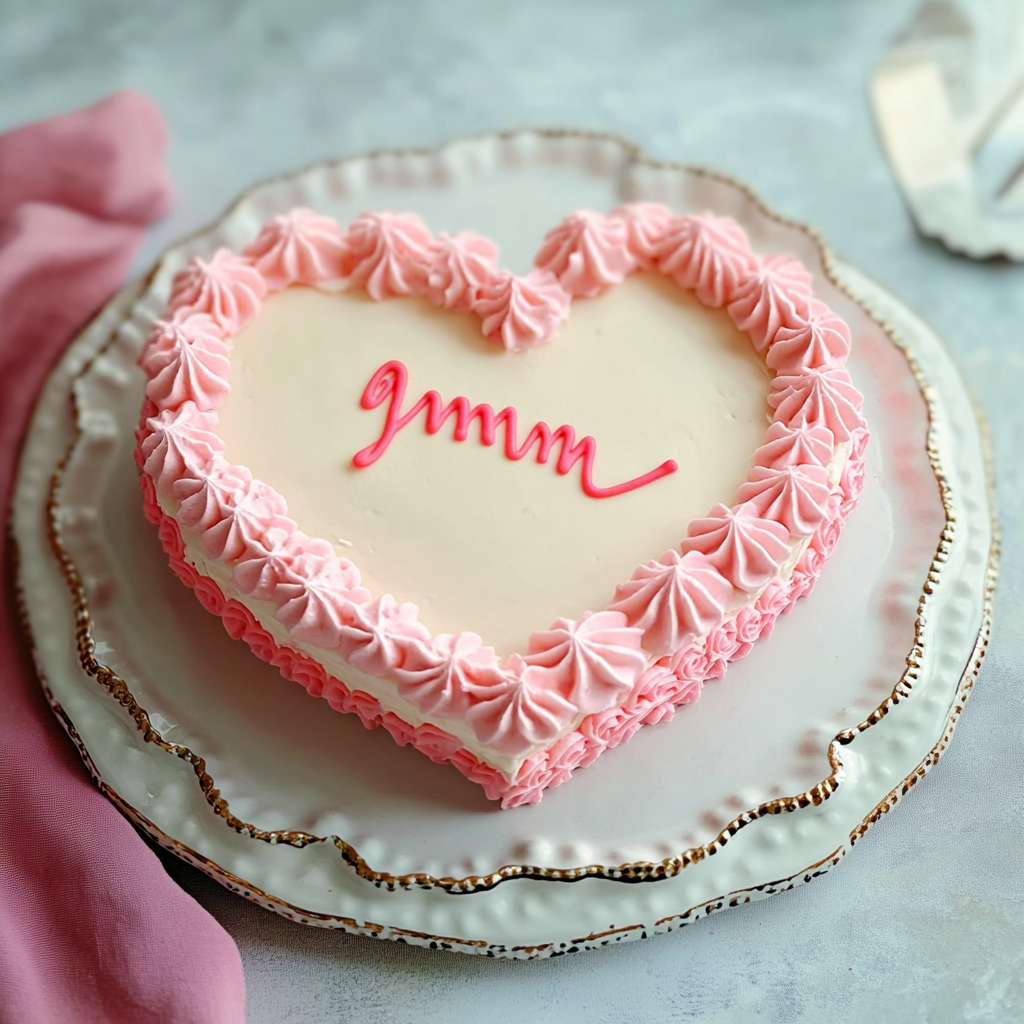
How to Make a Vintage Heart Cake: Step-by-Step Tutorial for a Nostalgic Treat
Hey there, friend! Today, we’re getting creative in the kitchen with a Vintage Heart Cake Tutorial—a charming and nostalgic treat perfect for any celebration. Whether it’s Valentine’s Day, an anniversary, or just a way to show someone you care, this heart-shaped cake with pastel buttercream and retro decorations will do the trick.
The best part? It’s surprisingly simple to make, and I’ll walk you through it step-by-step. So, let’s make something beautiful together!
Why You’ll Love This Vintage Heart Cake
This cake is all about love and nostalgia. I remember seeing cakes like these in old family photo albums—they had that beautiful pastel frosting and delicate piping and were always shaped like a heart. It brings back memories of simpler times, and I love that we can recreate it now to bring a little old-school charm to modern celebrations.
Not only does this cake look amazing, but it’s also soft, moist, and incredibly delicious. It’s as tasty as beautiful with fluffy buttercream and a rich vanilla flavour.
Ingredients Needed for the Perfect Vintage Heart Cake
For this cake, you only need a few simple ingredients:
For the Cake:
- All-Purpose Flour: The classic base for our cake.
- Baking Powder & Baking Soda: Helps the cake rise.
- Salt: Balances the sweetness.
- Unsalted Butter: Softened so it can be easily mixed at room temperature.
- Granulated Sugar: Sweetens the cake perfectly.
- Eggs: Helps bind the ingredients.
- Vanilla Extract: Brings that comforting flavour.
- Buttermilk: Keeps the cake soft and moist.
For the Buttercream Frosting:
- Unsalted Butter: Room temperature for easy beating.
- Powdered Sugar: Sweetens the frosting.
- Vanilla Extract: Adds warmth.
- Heavy Cream: Smooth and creamy frosting is created.
- Food Coloring: Pastel shades work best for that vintage feel—pink, blue, and lavender.
Tools You’ll Need
- Heart-Shaped Cake Pan: Essential for that lovely heart shape.
- Piping Bags and Tips: Use star tips or round tips for decoration.
- Offset Spatula: Makes frosting easier.
- Mixing Bowls: For mixing the batter, frosting, and colours.
Step-by-Step Vintage Heart Cake Tutorial
Prep Your Cake Pan and Preheat the Oven
Set the your oven to 350°F (175°C). Grab your heart-shaped cake pan and coat it with butter or non-stick spray, then give it a light dusting of flour. This will help ensure that your cake doesn’t stick when it’s time to take it out—trust me, we want it to come out clean and perfect!
Mix the Dry Ingredients
Combine dry ingredients in a medium bowl. Whisk it all together to ensure it is evenly distributed. This helps the cake bake perfectly every time.
Cream the Butter and Sugar
In a bowl, cream togethersugar and the softened butter. Mix until light and fluffy, about 3-4 minutes with an electric mixer. This step is key to a soft and airy cake texture.
Add the Eggs and Vanilla
Add the eggs one at a time, mixing well after each one. Next, add the vanilla extract and keep mixing until it’s all combined. Your kitchen should now smell amazing!
Combine the Wet and Dry Ingredients
Slowly incorporate the dry ingredients and buttermilk into the butter mixture. Mix gently until just combined—overmixing could result in a dense cake, and we want it to stay light and fluffy!
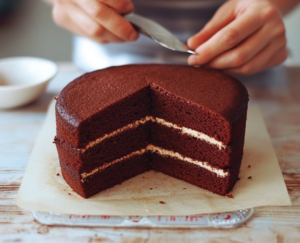
Bake the Cake
Pour the batter into your heart-shaped pan, then use an offset spatula to smooth out the top. Pop it in the oven for 25-30 minutes. Once it’s done baking, let it rest in the pan for about 15 minutes to cool down.
Decorating the Vintage Heart Cake
Now comes the fun part—decorating our cake to give it that vintage flair!
Make the Buttercream Frosting
While your cake cools, whip up the buttercream. In a large bowl, beat the butter until it becomes creamy. Gradually add powdered sugar, mixing on low speed. Once it’s all incorporated, add the vanilla extract and heavy cream. Beat on high until the frosting is light and fluffy.
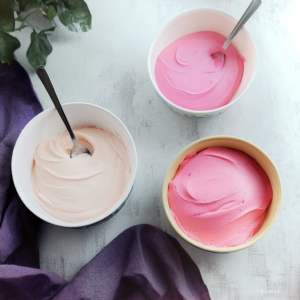
For that vintage look, Divide the mixture into bowls and add a some drops of food coloring to each bowl. We’re going for soft, pastel colors—think pinks, blues, and mints.
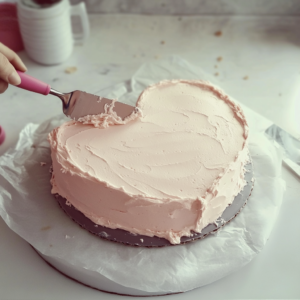
Apply a Crumb Coat
Once your cake has cooled, place it on your decorating surface. Spread a thin coating of frosting evenly across the entire cake.—this is our crumb coat. It helps lock in crumbs, so our final frosting layer is nice and smooth. Let the cake chill in the refrigerator for approximately 20 minutes to allow the crumb coat to set.
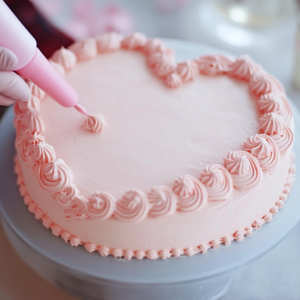
Decorate with Buttercream
After the crumb coat has hardened, apply frosting to the cake with a thicker layer of buttercream. Use an offset spatula to smooth it out, and don’t stress if it’s not perfect—that’s part of the charm!
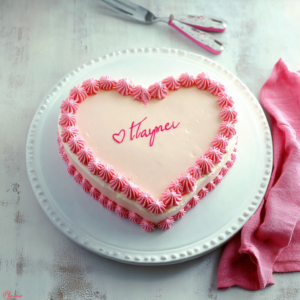
Now, grab your piping bags and tips to start decorating. Use a star tip to pipe rosettes around the edges or a round tip to add pearls or little dots. To make it extra special, you could also write a cute message in the centre, like “Be Mine” or “Love You.”
Pro Tips for the Perfect Vintage Heart Cake
- Room Temperature Ingredients: Use room-temperature butter, eggs, and buttermilk for a smooth batter and better texture.
- Gel Food Coloring: Get vibrant pastel shades without making the frosting runny.
- Piping Practice: Before decorating the cake, practice piping on parchment paper to get the hang of it. This will help you get more comfortable before the final look.
FAQ Section
How do I make a heart-shaped cake without a special pan?
No heart pan? No problem! Use a round cake pan and a square cake pan. Cut the round cake in half and place the halves along two sides of the square cake to create a heart shape.
How can I make the cake extra moist?
Using buttermilk in the batter is key to moistening the cake. For extra moisture, a small amount of oil (about 2 tablespoons) can be added as well.
Fun Variations to Try
- Chocolate Vintage Heart Cake: Add cocoa powder to the batter to make a rich chocolate version.
- Coconut Frosting: Mix shredded coconut into the frosting for a tropical twist.
- Lemon Vintage Cake: Add lemon zest to the batter and lemon juice to the frosting for a bright, fresh flavour.
Serving and Storing Your Cake
Once decorated, this cake is ready to impress! It’s perfect for sharing with family, friends, or someone special. If you have leftovers (though let’s be real, it’s so good there probably won’t be), Keep them in a sealed container at room temperature for 3 days. Keep it in the fridge for longer storage, but let it come to room temperature before serving.
Final Thoughts
We hope you loved making this vintage heart cake as much as we did! There’s something truly special about bringing a bit of nostalgia into your kitchen, and this cake is perfect for any occasion or to celebrate your love for vintage desserts. If you’re in the mood to try another classic treat, why not try our Mazapan recipe? It’s a deliciously sweet and nutty confection that pairs perfectly with a cup of tea—just like this vintage heart cake. Don’t forget to share
Happy baking, my friend!