How to Make Perfect Jammy Eggs Every Time: Step-by-Step Guide
Hey there, friend! If you’ve ever tried to make jammy eggs and ended up with either a runny mess or an overcooked yolk, I totally get it. They seem simple enough, but getting that perfect consistency—that golden, creamy, and almost jelly-like centre—can feel like a real mystery. But don’t worry, I’m here to help you master these delicious little gems so you can enjoy them whenever you like.
Today, we’re breaking down exactly how to make jammy eggs that are perfect every single time. Whether you’re adding them to a salad, ramen, toast, or just enjoying them on their own with a sprinkle of salt, these eggs are so versatile and can elevate almost any dish.
Why We Love Jammy Eggs
You might be wondering, what makes jammy eggs so special? For starters, they’re incredibly versatile. That slightly set but creamy yolk is a total game changer, adding richness and texture to whatever you pair it with. And they’re not just for fancy dishes—adding a jammy egg to your morning toast or a quick salad gives an instant upgrade.
Plus, making jammy eggs at home is super easy once you’ve got the timing down. It’s all about the right water temperature, cook time, and a little bit of patience. Let’s get cracking!
Ingredients You’ll Need
One of the best things about making jammy eggs is that you don’t need a lot of ingredients—just a few kitchen staples:
- Eggs: Use as many as you like. I usually cook about 4 at a time.
- Water: Enough to cover the eggs in your saucepan.
- Ice or Cold Water: To make an ice bath to stop the cooking process.
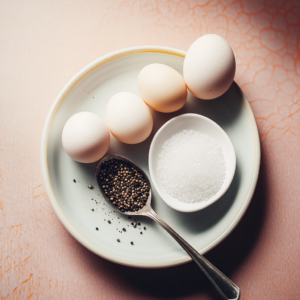
And that’s it! Simple ingredients that turn into something amazing.
Tools You’ll Need
- Saucepan: Large enough to hold the eggs in a single layer.
- Slotted Spoon: Makes removing the eggs easy.
- Bowl for Ice Bath: Quickly cool the eggs and stop cooking.
Step-by-Step Guide to Perfect Jammy Eggs
Let’s jump right into how to make these perfect jammy eggs:
Boil the Water
First things first, fill your saucepan with enough water to cover the eggs completely—about an inch or two above them. Heat the pan over medium-high heat and allow the water to come to a vigorous boil.
Now, I know it may be alluring to just throw the eggs in as soon as you see bubbles, but we want the water nice and hot before adding the eggs to ensure they cook evenly.
Carefully Add the Eggs
Once the water has reached boiling point, gently place the eggs into the pot. I use a slotted spoon to ease them in, so there’s no risk of cracking. If you’ve ever dropped an egg straight into boiling water and watched it crack on impact, you know the heartbreak!
Set a Timer
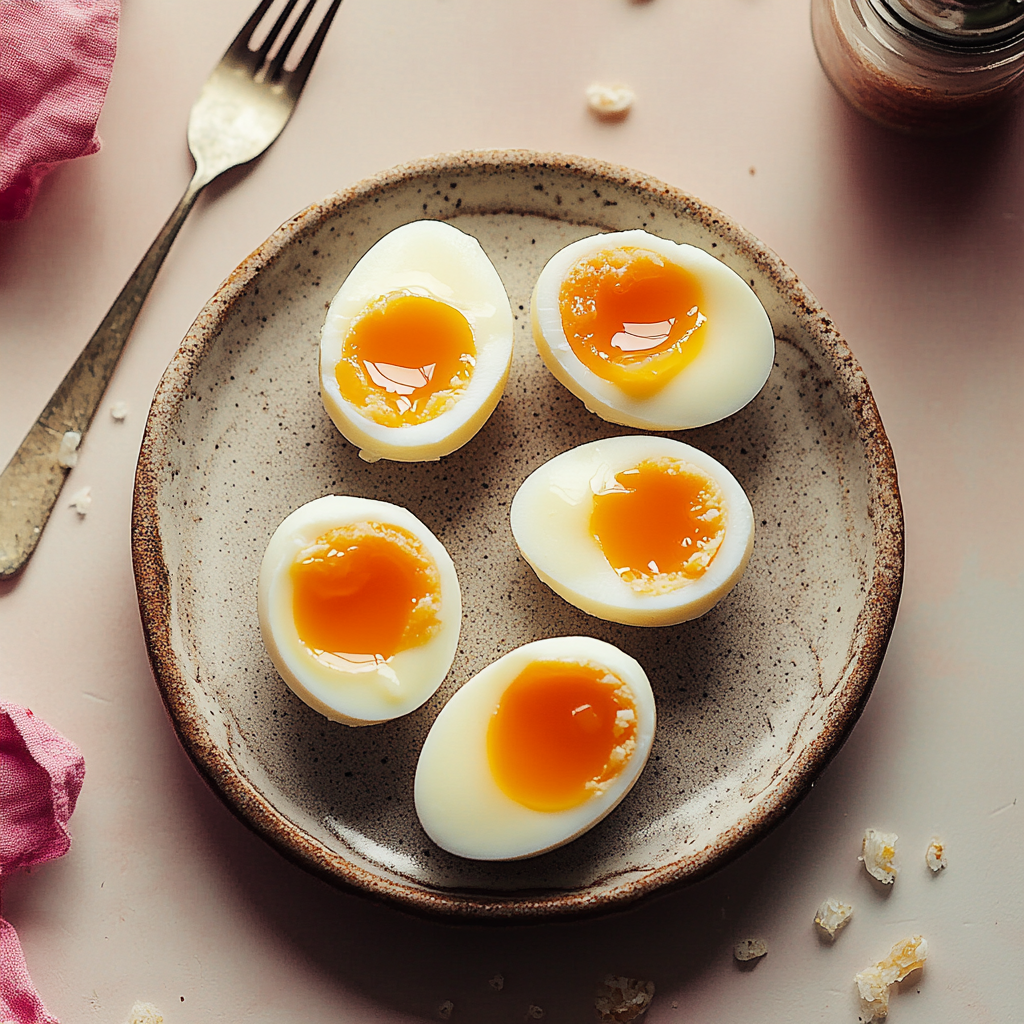
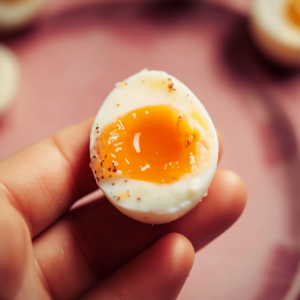
This is the most important part: timing. For jammy eggs, we want that perfect balance—set whites but a yolk that’s soft, creamy, and a little gooey.
If you prefer your yolks a bit firmer, go for 7 minutes. If you like them a little runnier, try 6 minutes. Timing is everything here, so keep a close eye on the clock!
Prepare an Ice Bath
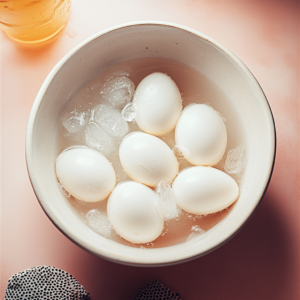
While the eggs are cooking, grab a bowl and fill it with cold water and ice. The cooking process will be stopped by the ice bath. Immediately once the eggs are done, helping to keep that yolk jammy without getting overcooked.
Transfer the Eggs to the Ice Bath
When your timer goes off, use the slotted spoon take the eggs out of the hot water and place them directly into the ice bath. Let them sit for at least 5-10 minutes. This will not only stop the cooking but also make peeling them much easier.
Peel the Eggs
Once the eggs are cool enough to handle, gently tap them on a hard surface and peel off the shell. If you’re having trouble peeling, peel them under a little running water—the water can help separate the shell from the egg white.
Serve and Enjoy
Now it’s time to enjoy your beautiful jammy eggs! Slice them in half and marvel at that perfectly set white and gorgeous, creamy yolk. Sprinkle a bit of salt and pepper.
They’re especially amazing on a piece of buttered toast, a fresh salad, or a steaming bowl of ramen.
Tips for Perfect Jammy Eggs
- Fresh Eggs vs. Older Eggs: Fresh eggs can be harder to peel, so if you have some eggs that are a week or two old, they’re perfect for boiling.
- Temperature Matters: Ensure that the eggs are at room temperature before boiling. If they’re too cold, they may crack when added to the boiling water.
- Don’t Skip the Ice Bath: This step is crucial to getting that perfect consistency and making the eggs easier to peel.
FAQ Section
How long do jammy eggs last?
You can keep jammy eggs in the fridge for up to 3 days. Be certain to keep them in a tightly sealed container, and note that the yolk may firm up a little the longer they sit.
Why are my eggs difficult to peel?
If the eggs are super fresh, they might be harder to peel. The ice bath also helps a lot, as it makes the membrane under the shell-less sticky. Another tip is to peel them under running water to make it easier.
Can I reheat jammy eggs?
Jammy eggs are best enjoyed at room temperature or cold. If you need to reheat them, place them in warm (not boiling) water for about a minute.
Fun Ways to Use Jammy Eggs
Now that we’ve made these perfect jammy eggs, let’s talk about all the delicious ways to use them:
- Ramen Topping: Jammy eggs are the perfect topping for a hot bowl of ramen. That creamy yolk mixed with the broth is heavenly.
- Avocado Toast: Step up your breakfast game by adding a halved jammy egg on top of your avocado toast.
- Salad Booster: Adding a jammy egg to your salad not only makes it prettier but also adds some richness and protein.
- Quick Snack: Honestly, a jammy egg with a pinch of salt and black pepper makes for an incredibly satisfying snack.
Why You Should Make Jammy Eggs at Home
Making jammy eggs at home is not just cost-effective, it’s also a great way to ensure they’re exactly how you like them. I love how versatile they are. They can turn a simple dish into something impressive, and they’re so quick to make that they’re perfect for busy mornings or when you want to add a little something extra to your meal without too much effort.
Plus, mastering the jammy egg is a satisfying kitchen win. Once you get the timing down, it’s one of those things that makes you feel like a real pro.
Common Mistakes and How to Avoid Them
Overcooking the Yolks: The key to jammy eggs is precise timing. If you leave them in the water too long, you’ll end up with hard-boiled eggs instead. Set a timer and stick to it.
Skipping the Ice Bath: This step isn’t optional! The ice bath stops the cooking process immediately, which is crucial for keeping that perfect jammy yolk consistency.
Cracking Eggs While Boiling: Adding eggs to already boiling water can sometimes cause cracks. Lower them in slowly with a spoon, and make sure they’re at room temperature to minimize this risk.
Storing Your Jammy Eggs
If you have leftover jammy eggs (lucky you!), You can keep them in the refrigerator for a maximum of 3 days. I recommend leaving the shell on if possible, as it helps keep them fresh longer. If they’re already peeled, just keep them in an airtight container.
Final Thoughts
There you have it—perfect jammy eggs every time! They’re such a small, simple thing, but they can elevate a dish. Whether you’re topping off a bowl of ramen, adding some richness to your salad, or just enjoying them as a quick snack, these eggs are a total game-changer.
If you’re in the mood to explore more delicious and versatile recipes, why not try making our Pistachio Cream? It’s a wonderful companion to these jammy eggs, especially if you’re looking for a sweet contrast to balance the savory flavors. I hope this guide helps you nail that perfect jammy consistency. Give it a try, and let me know how it goes. I’d love to see your creations, so feel free to share or tag me if you post a picture. Let’s keep making amazing things in the kitchen together!
Happy cooking, my friend!

